Tuesday, January 7, 2014

Knog Blinder Road 2 Mini-Review

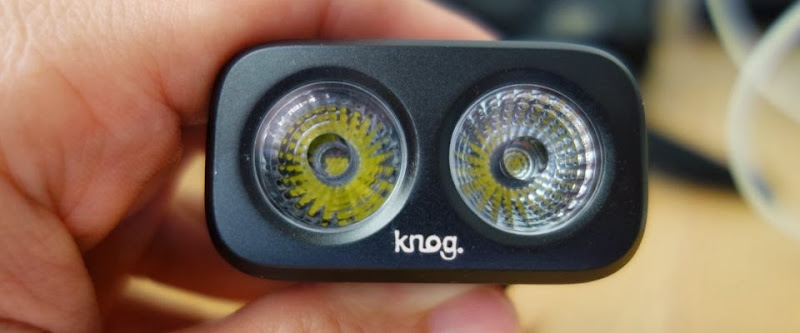
Knog Blinder Road 2

These are the most powerful headlights that I own. My first impression when I opened up the package was: wow, these are tinier than I expected... Really tiny. Smaller in two dimensions than the venerable Cateye dual AA battery powered Cateye HL-EL135 that has been my mainstay for years. It comes with two elastic bands that snap onto the light to fit different diameter handle bars. A helmet mount is included. Fit and finish get top marks in my book.

It's a great looking light but ergonomics are somewhat compromised because of the size of the light -- control buttons are small and probably next to impossible to depress when wearing gloves. A long press on the left button turns on the light. Another long press turns it off. Quick stabs at the button take you from one mode to the next in the following sequence: narrow, wide, narrow plus wide and flash. The right button selects high beam or low beam. I tend to keep mine on low power since the battery is rated for only 2hrs on steady modes and 6hrs when flashing. This is halved in high power modes.

The Good

  • Tiny. The best light is the one you have with you.
  • USB rechargeable. Plug it in when you arrive at the office so you have enough juice for the ride home in the evening. Don't forget the included USB extension cord.
  • Easy to mount. Mounts quickly and easily on handlebars. Also easy to remove. Make sure you take it with you when you leave the bike.
  • Waterproof. It has been deployed during several tropical torrential downpours and survived. Tropical monsoon rains dump serious amounts of water.
  • Lovely tint. Not all white LEDs have a nice tint. Some tend to be purplish and some overly greenish. This one is just a tad warm. Renders colours beautifully!

The Bad

  • Self detaching clasp. The exquisitely machined lump of heavy metal in the clasp looks and feels classy, but causes the clasp to release itself spontaneously when you go over a big bump. Now the Road Blinder Rear Light has the same clasp. However, the clasp for the Blinder Rear opens in a direction perpendicular to that of bouncing up and down from road imperfections, and therefore doesn't have the same tendency to pop open. This is a case for going to a cheap plastic clasp. Might not look as good, but at least, it will stay closed over bumps. I loop a rubber band around the clasp to avoid losing the light over bumpy trails.

The Ugly

  • Expensive. From a doller per lumen per hour perspective, this light isn't the cheapest.
  • Difficult to swap bands. The light comes with the smaller band attached. Swap to the larger band for 31.8 handlebars. This requires quite a bit of strength applied very carefully. The bands snap in easily, but are tricky to remove. So be patient.
  • Non-removeable battery. LEDs have a lifetime of 10,000 hrs or more. Running at full power would mean 9999 recharging cycles. A very good lithium polymer might get to 1000 while dropping to 50% capacity... Now if only we could replace the batteries...

Knog Blinder Road 2Here's the Knog with the USB charge plug flipped out and ready to charge.

Making and flying a delta kite

Dude and Beanie with The MBK Delta kite

Had to keep the kids occupied during the school holidays and was wondering what to do when we stumbled across a delta kite design from MyBestKite.com. Naturally, we chose a simple design to see if the designs were any good. The simple delta kite looked like a great candidate - easy enough to build and a different from the paper and bamboo diamond kites I used to fly as a kid.

Sail material was cut out of some lightweight garbage bin liner bags. We used white correction tape to mark the sail outline on the black plastic material. A couple of 3mm square section wooden sticks and 6mm dowels were purchased from Daiso. These were cheap but cut from soft wood. It did not take much force to break them. And in fact, the horizontal spreader snapped on the kite's maiden flight... Dude built up the tail by tying together strips of black garbage bag plastic.

With the kite completed, we piled into the car and headed to East Coast Park. There was a decent breeze and the delta kite took off effortlessly. Several gusts of wind snapped the horizontal spreader and sent the kite and crashing into the sea. No worries. We salvaged the kite, lashed the remaining dowel with some 3M scotch tape and sent it up again. Definitely a robust design!

Our confidence bolstered by the success of this first attempt, we decided to take on The MBK Dowel Delta.

Tools needed to splice Daiso 6mm square dowels into longer spars. Daiso dowels are 910mm long. The MBK requires 1200mm long dowels for the leading edge spars. The splice overlap was 40mm and so the extension was cut to a 330mm (well, I was half asleep and cut it to 290mm...).

Mark out the notch with a good old fashioned pencil. Start removing unwanted wood with a penknife. Stop before you hit the line. If you're a first timer, stop well before the line.

Once you have a pair of dowels whittled down with the penknife, finish the notch by filing with a rectangular profile metal/wood file. Use a coarse file or you will take forever to finish this. Here's a tip: line the two notches so they are side-by-side and file them down together. Check if you've removed sufficient wood by fitting the two pieces of wood end-to-end. Do this more often as you approached the marked out lines. Unless you have really precise markings, go slow and check often! You don't want to have to start over. I had to make 4 of these joints -- one on each leading edge spar and two on the horizontal spreader (for symmetry).

Light coloured plastic bags are a little harder to come by at the local supermarkets. Using correction tape to mark out kite sails isn't exactly economical either. So we got ourselves a white paint marker pen from the convenience store. This marker performed beyond our expectations. Remember, it's a paint marker. White lines that you lay down with this pen are more opaque than the black plastic of the trash bags. What's the big deal, you ask. The big deal is that the opacity allowed us to mirror the sail outline about two halves of the folded sail material by shining a torchlight from the bottom. Markings from the first half cast a shadow that guides you as you lay down dots. To keep registration between the two halves, cut down the plastic sheet to about 5cm from the outline before you transfer the trace from the first half. Staple along the edge every 5 to 10 cm. This will keep the halves from shifting with respect to each other as you trace along to transfer the outline to the second half.

Dude and beanie flying The MBK Dowel DeltaCredit where credit is due! Thanks to Tim Parish for sharing his designs on MyBestKite.com. If you're a parent thinking of spending some time with your kids, visit Tim's website and try building one of his kites. They really work!
Sunday, January 5, 2014

Carradice Bagman2 QR Support - Expedition: A User's Experience

Carradice Bagman2 QR Support - Expedition

I ordered the Bagman2 QR Support - Expedition together with the Camper long flap after some deliberation. Here's a summary of the thought process:

  • Bagman or saddle loop? Now that I was sure about getting a saddlebag, how was I going to attach it to the bike. Direct attachment to the saddle loops would be most budget friendly, but it would mean taking a risk with the bag nudging against the back of my thighs with every pedal stroke. Plus, I wasn't sure if it would "hang" nicely or end up resting on the plastic mudguard. Better bite the bullet and get a proper support...
  • Quick release or standard? Well, since I was already in deep, why not go all the way and get the added convenience of being able to attach and remove the saddlebag quickly? Turned out to be a good decision as I like to take the bag with me when I lock up the bike.
  • Sport or Expedition? After studying the Carradice website carefully and measuring the bicycle, I decided on the expedition model. Firstly, this is what Carradice recommends for the Camper long flap and secondly, I measured the clearance from the top of the rear mudguard (fender) to the attachment point on the saddle rails and found sufficient clearance to accommodate the 20cm height of the expedition. It turns out that the Camper long flap needs all of that height.

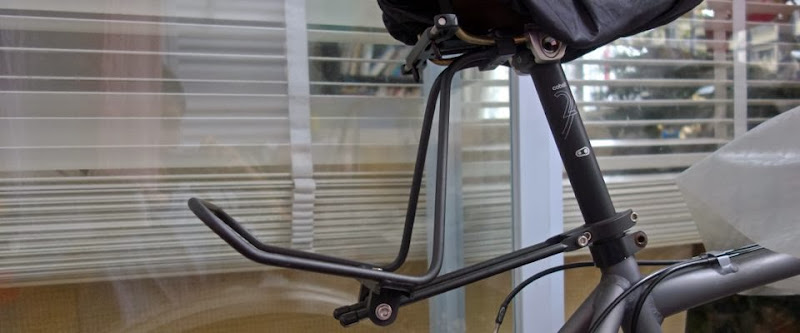
The official product page is found here. Because my old Principia Mac SL frame doesn't come with any eyelets, I had to order the Bagman2 seatpost collar. This little thingamajig clamps around the seatpost to provide attachment points for the two rods that help hold up the Bagman2 support. And if you're really observant, you'll notice that I used both rubber strips (shims) that came with the collar in order to fit my 27.2mm seatpost.

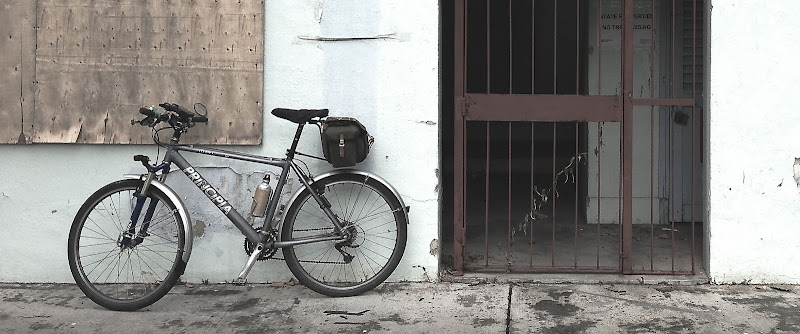
The other little thing you might want to take note of is that the sample photograph shown on the Carradice website appears to be that of a rather large mountain bike frame size. Look at the angle and length of the rods and compare that to my setup. In case it helps, mine is an 18" frame with 26" wheels. My guess it that you should be able to use this down to a 16" or perhaps even smaller frame size, but you should measure and check everything twice just to be sure.

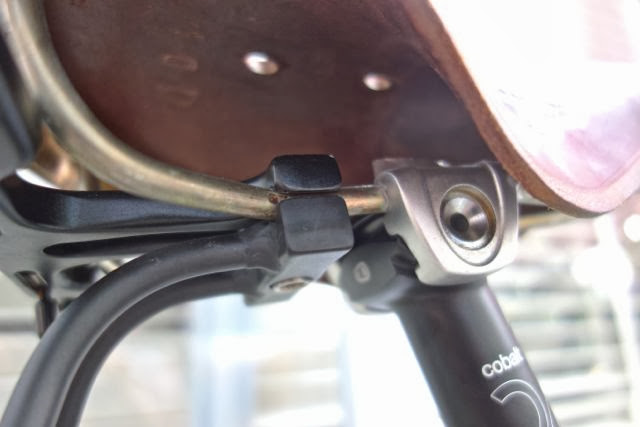
Yet another important detail you'll want to pay attention to is that you have at least 15mm of parallel saddle rail exposed behind the seatpost clamp. This is where the Bagman2 support clamps onto your saddle. One of the reasons for selecting a Crank Brothers Cobalt 2 seatpost was the very short clamp length. A Brooks B17 has a very short section of parallel saddle rail and you may run into difficulties if you mount your saddle farther forward or if you have a seatpost with a wide clamp.

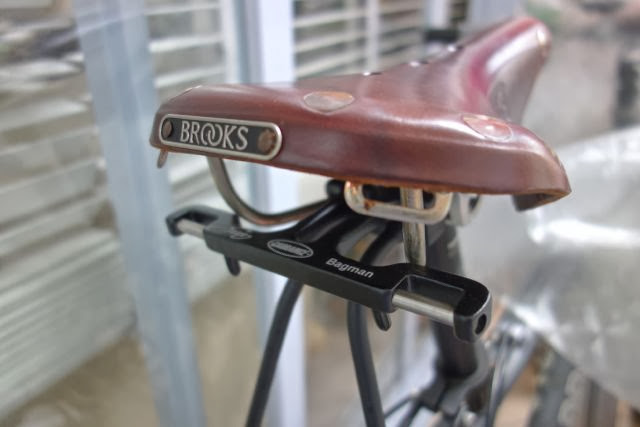
And finally, here's a photograph of the Quick Release attachment. The shiny bits are cylindrical pins that retract to accept the QR adaptor on the saddlebag. The knobs that retract the retaining pins are just visible, pointing downwards. Be sure to visually check that you have the retaining pins extended fully through the saddlebag quick release adaptor when you attach the bag to the Bagman2. One other thing: my sample of the Bagman2 isn't perfectly centered (left to right) with respect to the mounting clamp. This is visible when viewed from the rear of the bike. The support loop hangs a little further to the left, not quite enough to compromise functionality, but enough to drop it a notch in the quality rankings.

Principia MAC SL with Carradice Bagman2 QR Support - Expedition